Blazor Server, which renders the content on the server and relies on a socket connection to handle any UI interactions. Those interactions are sent back to the server over the socket to be handled by the server. This allows the server to have a quick initial load but because of the socket, it is prone to errors if there are any network or latency issues.
Blazer Web Assembly (WASM) has a better browser experience because the application is packaged up and runs directly in the browser but at the cost of a large initial load. It also requires a separate web API to handle any backend interactions.
.NET 8 still uses these hosting models but has introduced new rendering modes that give you much more flexibility on how you can display your components. With the new Interactive Auto rendering mode, you can start with Interactive Blazor Server SSR and then be handed off to the Blazor WASM bundle once that finishes downloading. This allows you to get the best of both worlds.
Yes, there are many other improvements, but these are the ones I’m excited about.
One thing I love about the Blazor Razor Components is that you can easily use them on established sites. In my example, I’m going to add a new Component to Kentico’s Dancing Goat Sample site.
Kentico added support for .NET 8 with the release of Kentico 13 refresh 11 however, the installer still uses .NET 6 for Dancing Goat. This is an easy change. Just update the TargetFramework in the DancingGoat.csproj file to use .NET 8 instead of 6.
					  <PropertyGroup>
    <TargetFramework>net8.0</TargetFramework>
    <RootNamespace>DancingGoat</RootNamespace>
    <UserSecretsId>79c858af-5444-4954-8d08-6592a961e82a</UserSecretsId>
  </PropertyGroup>
Edit the Startup.cs to add the Blazor Services
					...
services.AddRazorComponents()
    .AddInteractiveServerComponents();
...
This step is just a preference to keep my components organized and differentiate them from other ViewComponents that already exist on the site.
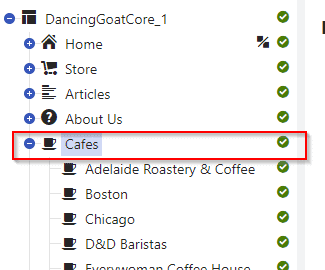
For my example, I’ve chosen to create a component to display the list of cafes on the Cafe Section page.
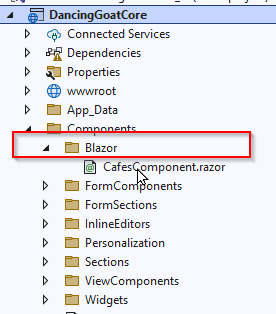
Create a new file in the Blazor components folder named CafesComponent.razor.
We are going to convert the list of cafes in the View/Cafes/Index.cshtml file into our new component. Copy the code from the source Dancing Goat view into our new component; it should be about lines 6 through 30. We’ll also create a new parameter so we can pass the cafes to the component. Our final output should look like the one below.
					@using DancingGoat.Models

// The variable ‘Cafes’ has been updated.
@foreach (var cafe in Cafes)
{
    <div class="col-md-6">
        <div class="cafe-image-tile cursor-hand js-scroll-to-map" data-address="@cafe.Contact.City,@cafe.Contact.Street">
            <div class="cafe-image-tile-image-wrapper">
                @if (!string.IsNullOrEmpty(cafe.PhotoPath))
                {
                    <img decoding="async" src="@cafe.PhotoPath" alt="@cafe.Contact.Name"  title="@cafe.Contact.Name" class="cafe-image-tile-image" />
                }
            </div>
            <div class="cafe-image-tile-content">
                <h3 class="cafe-image-tile-name">@cafe.Contact.Name</h3>
                <address class="cafe-tile-address">
                    <a href="javascript:void(0)" class="cafe-tile-address-anchor">
                        @cafe.Contact.Street, @cafe.Contact.City
                        <br />
                        @cafe.Contact.ZIP, @cafe.Contact.Country, @cafe.Contact.State
                    </a>
                </address>
                <p>@cafe.Contact.Phone</p>
                <p>@cafe.Note</p>
            </div>
        </div>
    </div>
}
@code {
    [Parameter]
    public IEnumerable<CafeViewModel> Cafes { get; set; } = Enumerable.Empty<CafeViewModel>();
}
Now that we have our new component created, we can implement it in the Cafes section View. To do that, we simply delete the code that we copied from the .cshtml file and call our CafesComponent.
					@using DancingGoat.Components.Blazor
@model DancingGoat.Models.CafesIndexViewModel

<div class="cafes-page">
    <div class="row"><h2>@HtmlLocalizer["Our cafes"]</h2></div>
    <div class="row">
            <component type="typeof(CafesComponent)" render-mode="ServerPrerendered" param-Cafes="Model.CompanyCafes" />
    </div>

...
Now, it’s ready to build and run.
Incorporating a bit of Blazor into your Kentico Xperience 13 site is an excellent way to explore the new technology without committing to a complete site overhaul. This gradual approach allows you to experiment with Blazor’s features, such as its component-based architecture and reusable UI elements, making it easier to add interactive features to your application.
By integrating Blazor alongside your existing MVC framework, you can see how it improves the overall functionality and performance of your site. This method provides valuable insights into how Blazor fits into your development workflow, helping you decide if further integration is right for your project.

Stay up to date on what BizStream is doing and keep in the loop on the latest in marketing & technology.