So, first, let’s set the stage. At BizStream, we have a Pulse meeting with the entire group every Monday morning. It’s a general review of the company’s heartbeat, and one of the topics covered in this meeting is who is out of the office. This conversation is a general overview of who is on PTO that week or the following Monday. This is useful to get a glance at the week in general. However, things change after Monday. Or sometimes, I just don’t remember all the names from the Pulse meeting.
I thought – “it’d be nice to be able to pull up Slack and see a daily message of who is on PTO for a given day.” So, that’s what I made. We will walk through creating and deploying a timer-triggered Azure Function that accomplishes just this. We will walk through using a Key Vault to store the secrets needed for the API calls in a secure manner, and then we will cover remote debugging of your newly created Azure Function App.
In this post, we will not be covering gathering data using the REST API from TMetric or creating a Slack app for sending a message to a channel – which I did via a webhook URL for the Slack app. I also used RestSharp and Newtonsoft.Json for data consumption. You could consume any API for data you’d like and create a Slack message out of it if you aren’t sure what might be useful for you.
Before you get started, make sure you have the following requirements in place:
You also need an Azure account with an active subscription. Create an account for free.
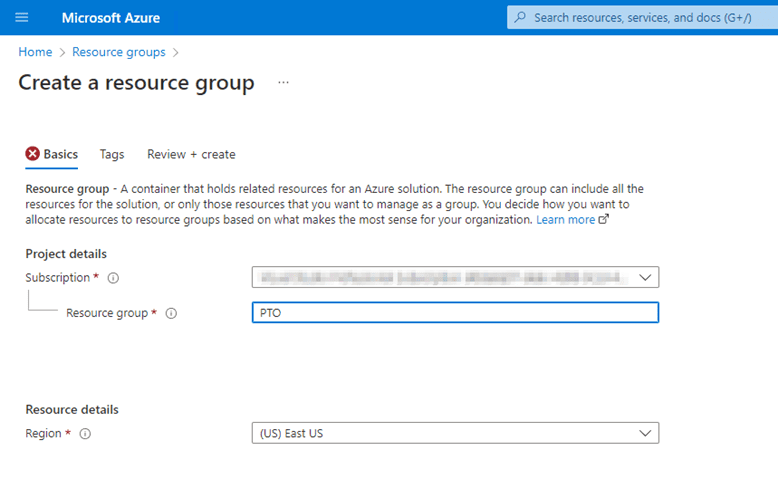
We will first need to create a Resource Group in Azure. Search for Resource Groups and select Resource groups from the results. On the Resource groups page, click Create.
Select your subscription and type in a name for the resource group, I named mine PTO, but you can call it what you’d like. Choose a Region, typically the one that is closest to your current time zone.
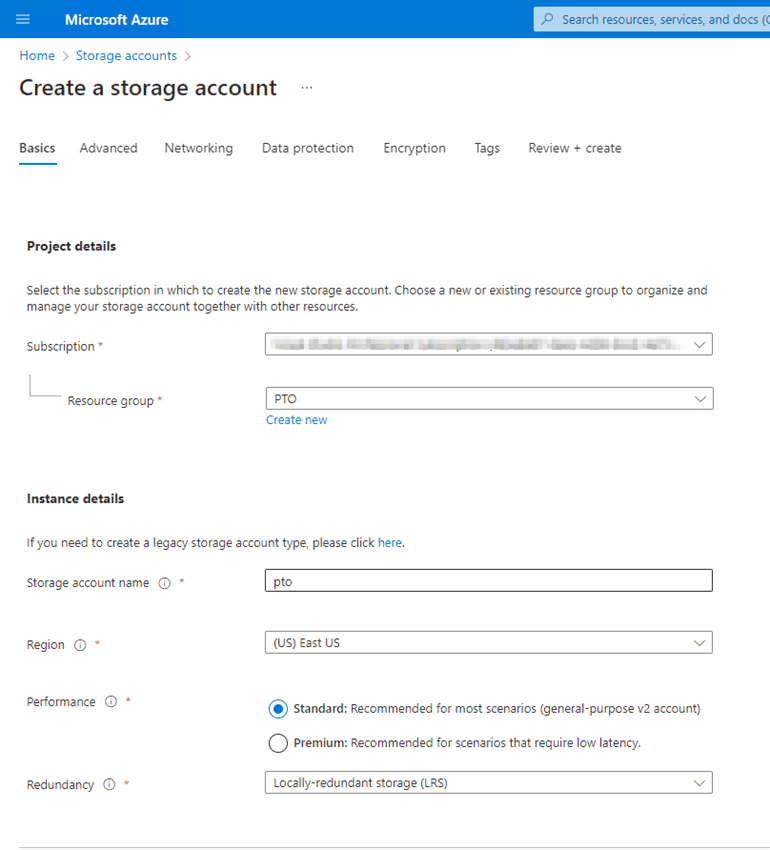
Next, we need to create a Storage Account. You can follow the same process of searching for Storage Accounts, clicking on it, and selecting Create. The same subscription is most likely pre-selected but verify the correct subscription is selected. You will want to choose the resource group that we just created in the last step. Type in any name that you would like. You want to select the same region you set for your resource group. Standard Performance will work for this use case. Since this isn’t an important application, you’ll want to change the Redundancy to Locally-redundant storage (LRS).
Let’s head back to the search bar, type in Function App, and select it. Click create and fill in the details. Select the same subscription and resource group as before—type in a name for your Function App. We will be using .NET 6 and deploying to the same region we were using before. It will be a Windows OS, and the Plan type is Consumption (Serverless).
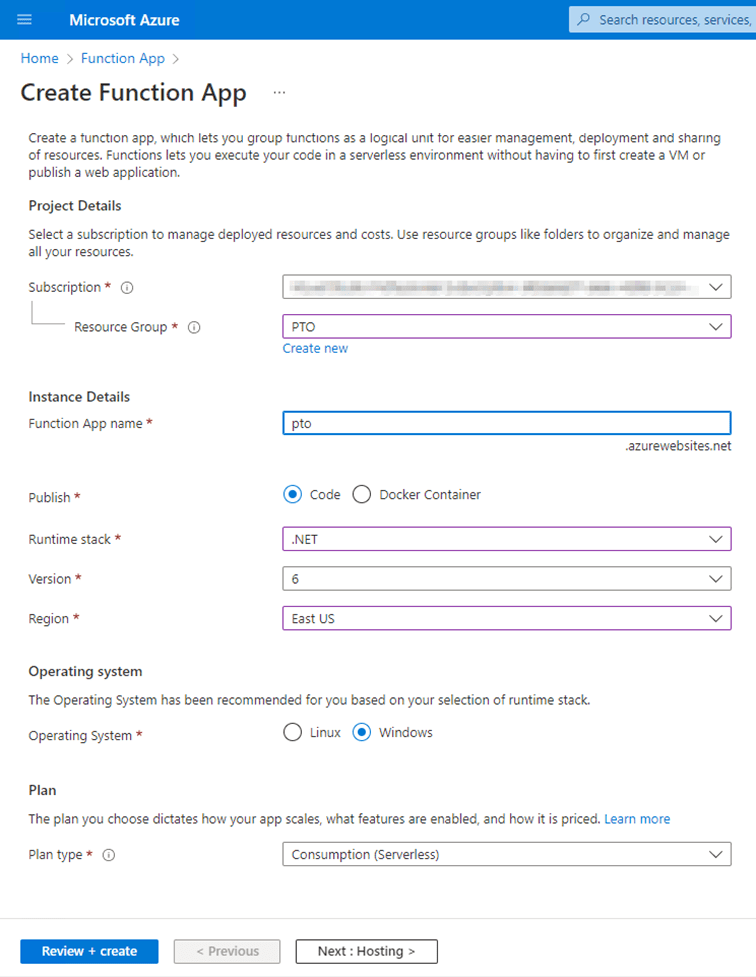
Click Next: Hosting and select the storage account that was just created in the previous step. Click Next: Networking and Next: Monitoring (or use the tabbed navigation to go to Monitoring). On the Monitoring tab, select No for Enable Application Insights. Now you can select Review + Create.
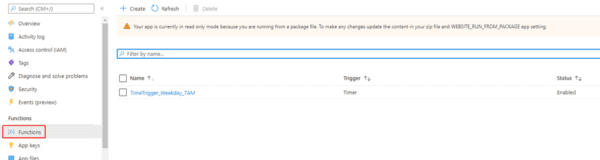
After it is created and the deployment has finished successfully, click on the Go to resource button. Once the resource page has loaded and you see the Overview section, identify the heading Functions, select Functions on the left navigation, and click on it.
Let’s open VS Code and do a little Azure from there, shall we?
In your new window of VS Code, go to the Azure tab on the left-hand navigation – assuming the Azure tools extension has been installed. In VS Code, you’ll also need to be signed in to your Microsoft Azure account with the subscription to the resource group and storage account we created in the previous steps.
To sign in, you can press Ctrl + Shift + P to open the Command Palette in VS Code, start typing Azure Sign in, and select the option. You should also see an option to sign in under the Azure panel, which we will get to in the next step.
Choose the Azure icon in the Activity bar. In the Azure panel, under Workspace, click the plus button and select Create Function.
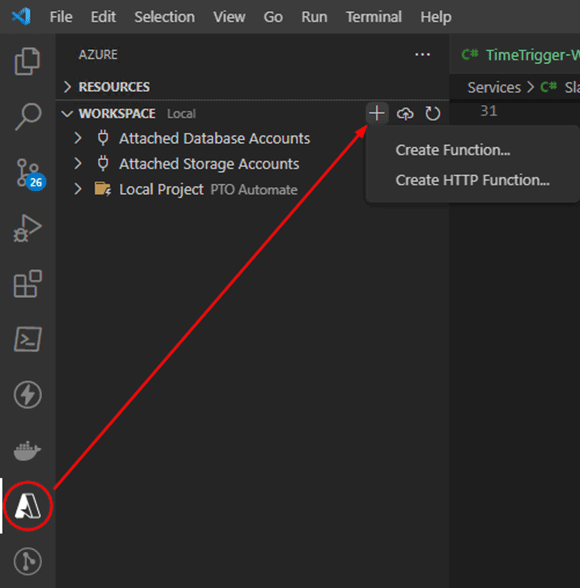
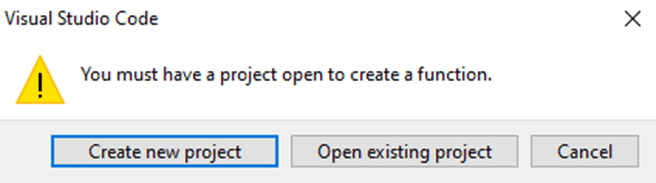
You shouldn’t have any projects listed here yet; there will be a pop-up asking you to create or open an existing project – select Create new project.
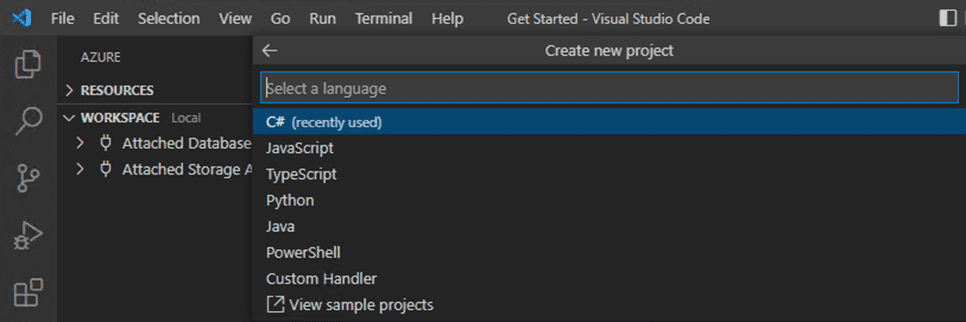
Select a location where you’d like to store the project locally. VS Code will then walk you through creating the Function locally so you can code from VS Code (or Visual Studio, more on that later). In the command palette, select C#.
Continue selecting the following options as you create the project:
After entering the cron expression, it will ask to select a storage account for debugging and internal use. You can emulate a local instance or select an existing storage account. In this scenario, you will select the storage account we created earlier. In the command palette, choose the subscription under which you created the storage account, and then select the storage account. Open the new project in the current window.
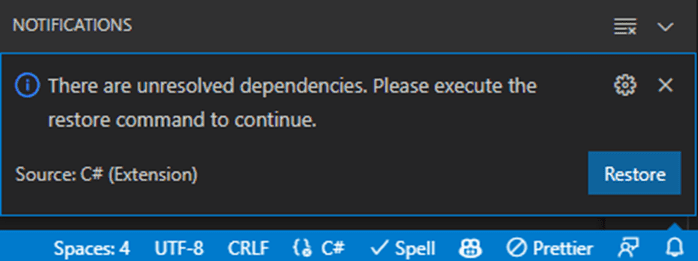
Once the project is created and opened, you may be missing some necessary dependencies. There should be a notification from VS Code saying there are unresolved dependencies. Click Restore.
You can install the dependencies manually if you don’t get the notification. To do so, run a dotnet add package command in the terminal. Or, if you have the NuGet Package Manager GUI extension installed in VS Code, you can also install it with that tool.
dotnet add package Microsoft.Azure.WebJobs –version 3.0.33
Your new timer trigger function is ready for editing. The template should look something like this:
					public class TimerTrigger_Weekday_7AM
{
    [FunctionName("TimerTrigger_Weekday_7AM")]
    public void Run([TimerTrigger("0 0 7 * * 1-5")]TimerInfo myTimer, ILogger log)
    {
        log.LogInformation($"C# Timer trigger function executed at: {DateTime.Now}");
    }
}
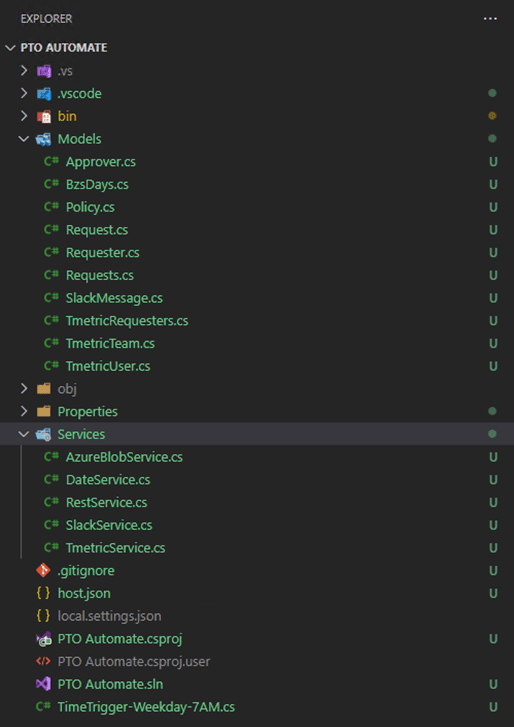
At this point, I already had a console application with working code for my TMetric and Slack calls. I recreated the classes and services in the newly created Function App.
The models I have mainly represent the JSON objects I am getting back from TMetric. After getting the data for who is on PTO today, I then build an appropriate string to send to the Slack webhook URL.
You will want to store your keys and secrets in the local.settings.json file for local development purposes. To read these values, you will want to use the Environment.GetEnvironmentVariable(string variable) method. Below is the code from my Slack Service to get the webhook URL’s value.
Environment.GetEnvironmentVariable("Slack", EnvironmentVariableTarget.Process)
Use this to store and access any secrets you need for your API calls for testing locally. When we are ready for testing, it’s easy to debug locally. Open Run from the menu and select Start Debugging (or press F5).
However, you’ll not want to track your local.settings.json in Git or publish them to Azure. You might be wondering; how do we securely store and access our secrets in our Azure Function App when deployed?
Azure has an excellent tool for solving this problem, and that is using a Key Vault. Before creating the Key Vault, we must enable system-assigned managed identity for our Function App.
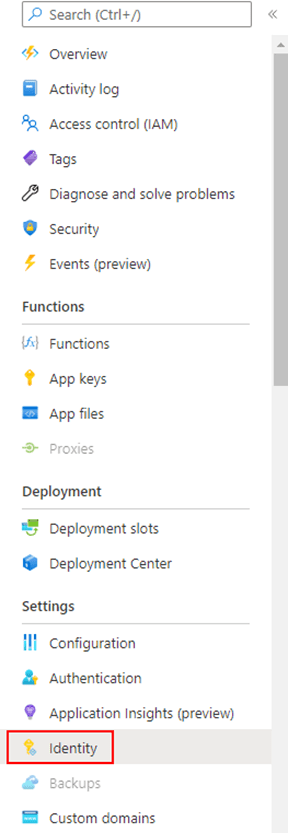
Let’s head back to Azure for a little bit to do that. Navigate to the Function App. Under Settings, click on Identity.
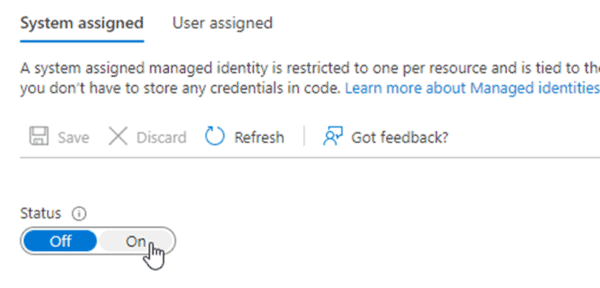
On the Identity blade, under the System assigned tab, change the Status to On and click Save. The system will generate an identity for you – click Yes on the subsequent popup asking to assign the managed identity.
Now that we have an identity to provide permissions, we need to make a Key Vault. In the search bar, type Key Vaults and select it from the results. On the Key Vaults page, click on Create.
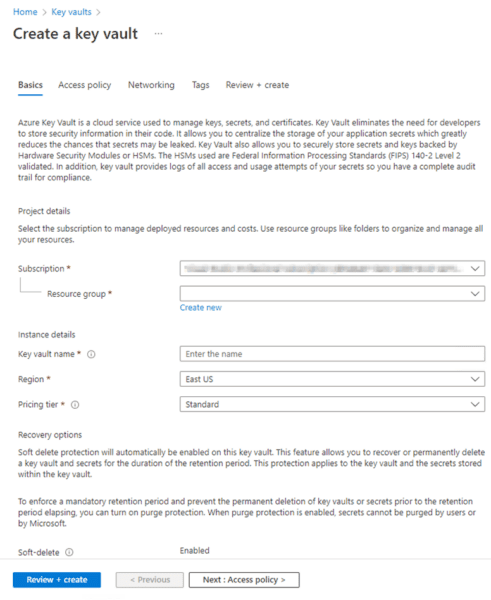
On the Create a Key Vault blade, select the subscription and resource group that you’ve been using. Enter a name for the key vault. Use the same region your other resources have used and leave the pricing tier set to Standard.
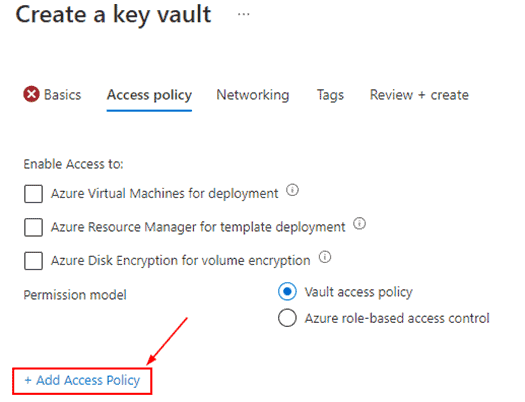
Click Next: Access Policy and then click Add Access Policy.
You can leave the template drop-down blank on the Add Access Policy blade. Add Secret permissions for Get and List. Open the selection for Principal and search for the name of your Function App. Click on the name of the Function App and then click the Select button towards the bottom. Then click Add.
After that, we are ready to Review + create. After the creation and deployment of the key vault are complete, go to the resource. In the left navigation, under Settings, click on Secrets.
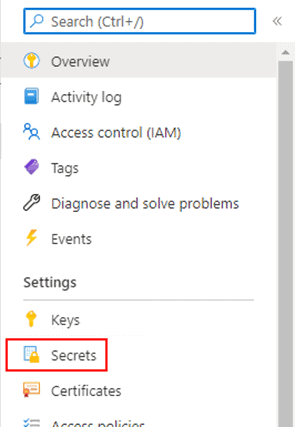
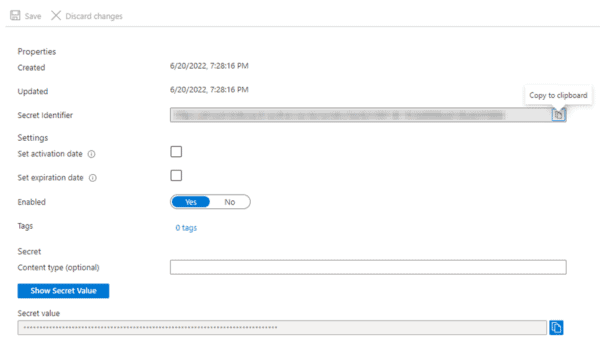
On the Secrets blade, generate as many as needed for the keys and secrets your Function App needs. After creating each, you want to click on the secret version, copy the Secret Identifier, and paste it into Notepad. You’ll need these in a moment.
Now that we have our key vault with our secrets and permission to access the Function App, we need to create the application settings that correspond to those secrets in the Function App. Go to the Function App and click on Configuration under Settings in the left navigation menu. Under Application Settings, click on New application setting.
Name these settings the same as what you named your settings in your local.settings.json so that your environment variable names don’t need to change in your function code. The value will be @Microsoft.KeyVault(SecretUri=<the-secret-identifier-link>) where the <the-secret-identifier-link> should be replaced with the corresponding identifiers you copied into Notepad.
Once these have been entered, save the settings before leaving the page.
While we are here entering settings, there is another setting we should add for our timer trigger to occur when we expect it to. By default, serverless Azure Function Apps that use timer triggers will use UTC. We need to add another setting, WEBSITE_TIME_ZONE, if we want more control. I am on Eastern Standard Time, although you can find the list of time zones here. Make sure to save the application settings again.

It’s time to put together the timer trigger function. The framework was created already, but we need to clean out the Run method.
Next, you will want to put together the logic that makes sense for the type of message you are creating (if you are putting together a similar app). Below is my Run method.
I want to point out that I have updated my method to an async method and the return type of Task. I am running some async methods for the API calls and Azure Blob storage integrated into the function.
					public class TimeTrigger_Weekday_7AM
{
        [FunctionName("TimeTrigger_Weekday_7AM")]
        public static async Task Run([TimerTrigger("0 0 7 * * 1-5")]TimerInfo myTimer, ILogger log)
        {
            try
            {
                var client = RestService.CreateRestClient();
                var requesters = TmetricService.GetRequesters(client);
                var pto = TmetricService.GetPtoRequests(client, requesters.Users);
                var message = string.Empty;
                if (await DateService.IsHoliday(DateTime.Now))
                {
                    message = "It's a holiday!";
                }
                else if (pto == null || pto.Count == 0)
                {
                    message = "The gang is all here!";
                }
                if (message != string.Empty)
                {
                    await SlackService.SendMessage(new SlackMessage
                    {
                        text = message
                    });
                    return;
                }
                // we must be working and there must be someone on PTO
                var sb = new StringBuilder();
                sb.AppendLine($"BizStreamers on PTO Today, {DateTime.Now.ToShortDateString()}:");
                foreach (var request in pto)
                {
                    sb.AppendLine($"{request?.Requester?.Name}");
                }
                await SlackService.SendMessage(new SlackMessage
                {
                    text = sb.ToString()
                });
            }
            catch
            {
                await SlackService.SendMessage(new SlackMessage
                {
                    text = "Something went wrong today. Check Asana."
                });
            }
        }
    }
}
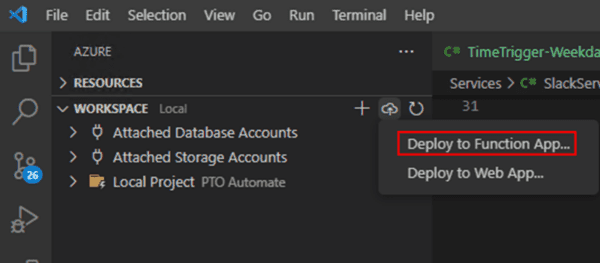
Now that you are ready to deploy something working, go ahead and deploy it to the Function App we created earlier. In VS Code, open the Azure panel again. Under Workspace, click the Deploy button and select Deploy to Function App.
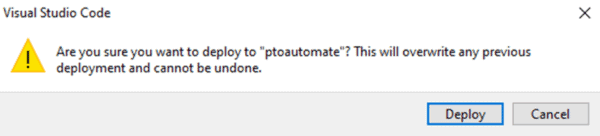
The command palette will pop up. Make sure to select your subscription where you’ve created your Resource Group and Storage Account, and then you will select the Function App you want to deploy to. After your selections, you will need to confirm the deployment, as it will overwrite any previous deployment and cannot be undone.
The output of the process will be shown in the terminal in VS Code. Let’s look at the function in Azure. Go to the Function App that we deployed to. Click on Functions in the left-side navigation, and you should see the timer trigger function you created and deployed.
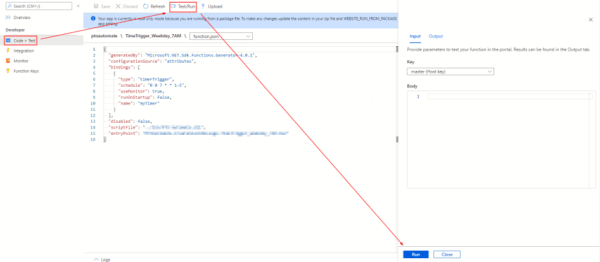
Depending on the time you set for the cron expression in your trigger, you may want to test your function but not wait for it to execute. Click on the function name and then click on Code + Test on the function blade under the Developer section. On the Code + Test blade, click the Test/Run button to open another blade to the right. You can click run here to execute your function whenever you’d like.
If you experience issues or things do not work as they did locally during your testing, you may want to do some remote debugging. There are a few ways to debug your function remotely, but I will show you what I have personally found as the easiest way to debug. You’ll need Visual Studio 2022 for this technique.
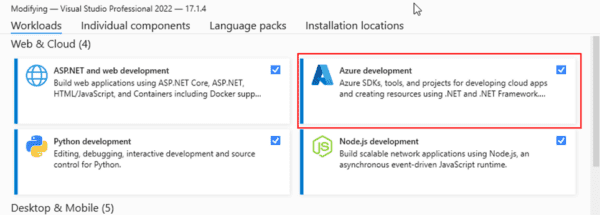
To use VS2022 to debug remotely, you will need to ensure the Azure development features are installed. If you are freshly installing VS2022, you can select Azure development during the installation. If you already have VS2022 installed, you can modify your installation by going to Tools > Get Tools and Features, checking Azure development, and clicking Install while downloading.
After ensuring you have the Azure SDKs, click File > Open > Project/Solution and select the project file in your function’s repository on your local system. This will create a solution file for you, so you can easily open the project in VS Code or Visual Studio if you have a preference.
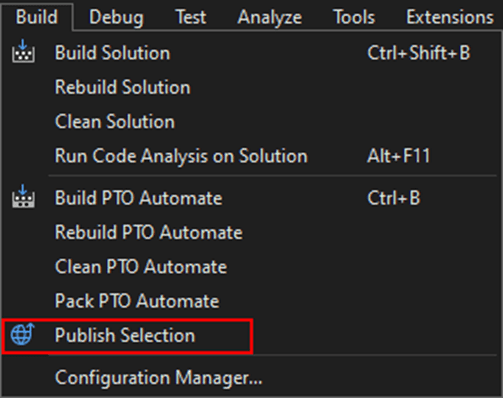
In the file menu, click on Build and select Publish.
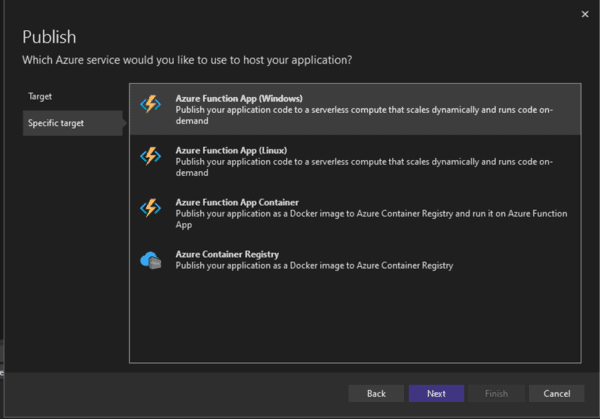
There will be a Publish pop-up asking you where you want to publish. Click on Azure for the Target and select Azure Function App (Windows) for the Specific Target.
Next, you will need to sign into your Azure account. Then, on the Functions instance, leave View as Resource Group. Under Function Apps, expand the Resource Group and select the Function App you created and published from VS Code. Then click Finish.
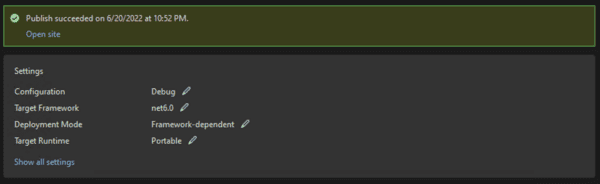
Now you have a Publish profile synced with your Azure subscription and the Function App you want to remote debug. On the Publish window, to hit breakpoints, you will need to adjust the publish from Release to Debug. You can edit the configuration by clicking the pencil and changing the Configuration to Debug.

After saving the configuration, go ahead and click the Publish button. You will see the logs of the publish populate the Output window. You will see a successful message upon completion.
Now you are ready to start a remote debugging session. To do this, under the Hosting group, click the ellipses (…) and select Attached debugger.
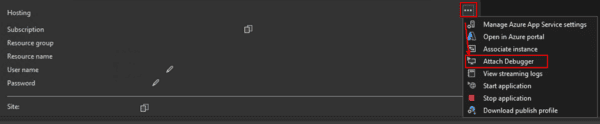
Visual Studio will do the work of attaching to the Function App in Azure and allows you to debug from within the deployment environment. It may take a moment before it connects, but you can set breakpoints where necessary to debug your application.
If you get the error that the Azure resource is not available, then you most likely need to go to Account settings in VS 2022 and sign back into your Azure account.
That was a basic approach to creating a timer triggered Function App in Azure. There are additional types of triggers, and you can create much more elaborate functions and workflows to accomplish business tasks. For example, you could use a Blob trigger to process invoices from your e-commerce website into another system, such as an ERP system. Functions are great ways to offload unnecessary overhead with your applications.

Stay up to date on what BizStream is doing and keep in the loop on the latest in marketing & technology.